Showing posts with label recipes. Show all posts

Sunday, June 22, 2014

Mountain Trout Stuffed with Lemon-Butter Mushrooms

Recipe for stuffed trout
What a long, strange week-plus it's been since I last blogged! I'll spare you the gory details, but suffice it to say that nothing went as planned with the house we thought we were buying, and with the job I thought I was starting last week. The good news is that we've found a new house we love and plan to make an offer on tomorrow, AND I'm now all set to start my new job tomorrow, so I think our temporary streak of mishaps and setbacks is coming to an end.

During this tumultuous time, Greg treated me to the following magnificent fish dinner: Fresh local mountain trout, butterflied and stuffed with butter, lemon and mushrooms, and delicately seasoned with tarragon, salt & pepper. I whipped up some sassy sauteed spinach to serve on the side, and that recipe will be posted here in the near future.

Back to the trout: There's no need to measure any ingredients for this recipe. Simply plan on one butterflied trout per person (they're not very large), then use your judgment and common sense when layering the ingredients and sprinkling with the seasonings. As with any fish recipe, it's imperative to use the freshest fish possible.

stuffed trout with lemon butter mushroomsIngredients
Butterflied trout
Thinly sliced lemon
Sliced mushrooms
Butter
Coarse salt & crushed pepper
Dried tarragon (or another herb such as dill, parsley or marjoram)

Preheat oven to 350°F. Open up each butterflied trout, skin side down, in the center of a square of foil that's large enough to wrap completely around the fish when it's stuffed and folded back together. Place a few lemon slices in a single layer on one half of the fish, then a few pats of butter, then the sliced mushrooms. Sprinkle lightly with salt, pepper and tarragon or other herb. Fold the other half of the trout back over the topped half to "close" the fish up, then wrap the whole fish with aluminum foil, crinkling the seams of the foil to seal.

baking stuffed trout
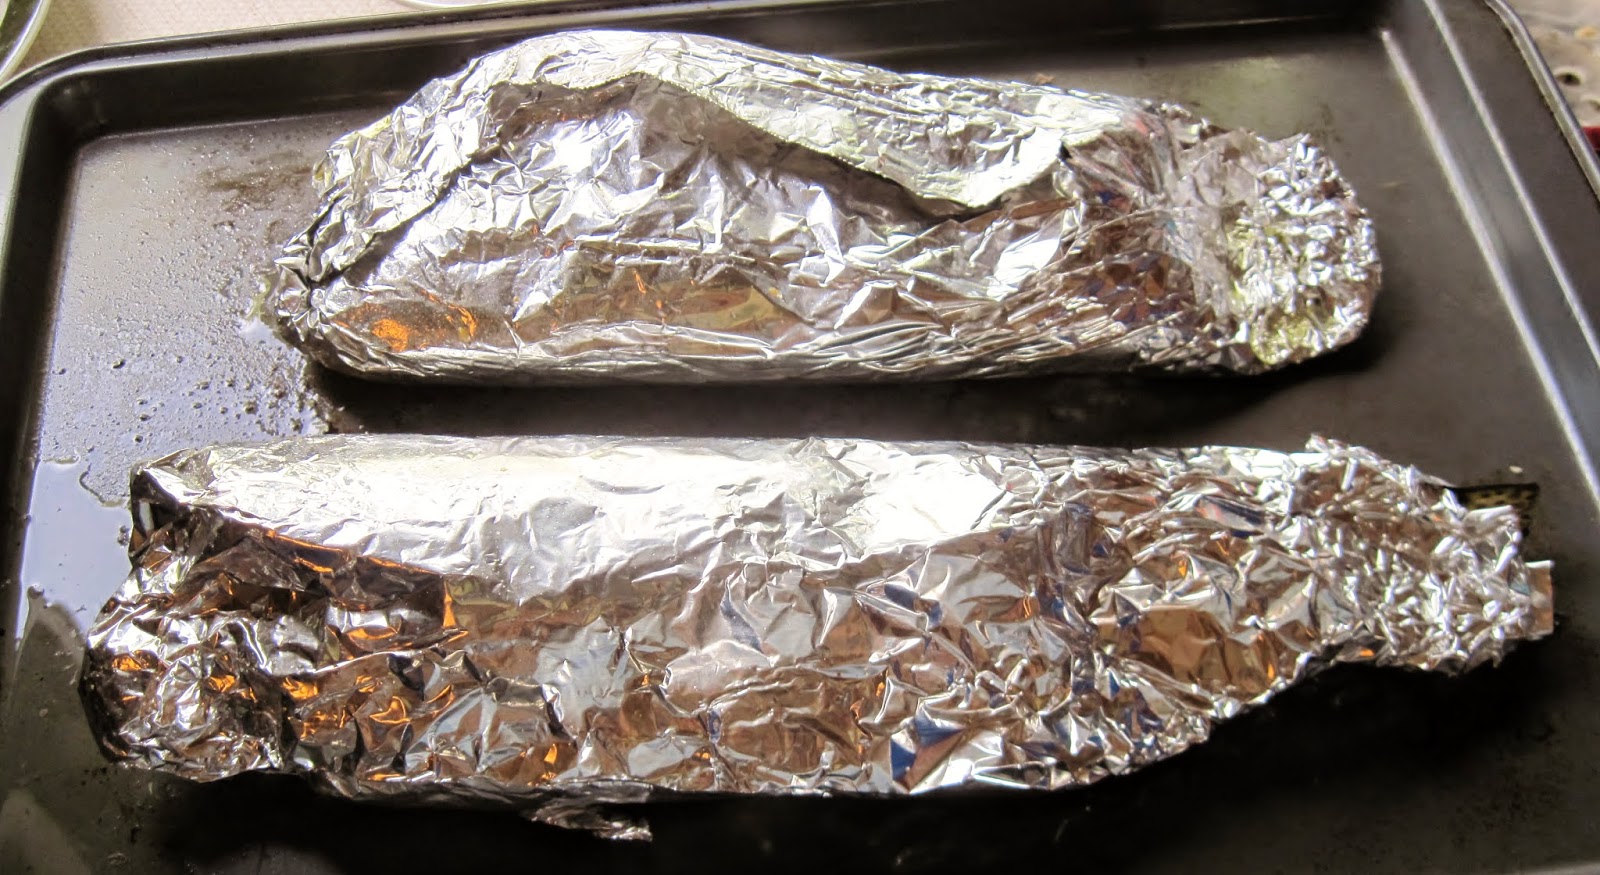
Place the packets of fish on a baking sheet, then bake for 20 to 25 minutes at 350°F until fish is fork-tender.  Remove from oven, carefully open each foil package and gently transfer each baked fish onto a plate. Enjoy!

Zestfully yours,
Gloria

PS:  As much as it pains me to admit it, this fish requires no hot sauce. But if you must spice it up, keep it simple and select a milder, gentler, simpler hot sauce such as Cholula Green Pepper Sauce or Amazon Green Hot Sauce.


Wednesday, June 11, 2014

Sauteed White Kale & Mushrooms

white kale with mushrooms
If there's one dark leafy green vegetable that Greg will eat without complaint, it's kale. He also loves mushrooms, so I whipped up this zesty side dish featuring two of his favorite vegetables to serve with seared pork chops as my first dinner cooked in Montana in our RV, where we're living until we close on our new house.

With its robust seasonings, my sauteed kale and mushrooms would be equally appropriate and tasty if served alongside steak, chicken, venison or another hearty entree.

white kale
white kale
The kale is white kale from the local farm stand at a garden shop within a short walk of the RV park at which we're staying. I had never heard of or seen white kale before, and these bunches had been harvested earlier that same morning, so I took a chance and bought a bunch. Its flavor was surprisingly mild and almost sweet, without any bitterness at all, and its broad, flat leaves proved very easy to wash, strip from the stems and tear or chop for cooking.

If you can find white kale in your area, I recommend giving it a try. If it's not available where you live, use any other variety of kale -- and for that matter, you can substitute spinach, chard, or other dark leafy greens if you prefer them over kale or simply have them on hand.

Ingredients
1 bunch white kale (or other greens), washed, stems removed and leaves torn or chopped
1 medium onion, chopped
6 cloves garlic, sliced as thin as possible
4 oz (1/2 a box) mushrooms, cleaned & sliced
1 tsp (or to taste) savory steak seasoning such as Stubb's Steak Spice Rub
2 Tbs olive oil

Stubb's Steak Seasoning
Heat the oil in a medium heavy-bottomed pot or a large, deep skillet over medium heat. Add onions and saute until translucent and soft. Add garlic and mushrooms; saute until both are soft. Stir in the kale a handful at a time, stirring each handful until it cooks down enough to add another handful. Stir in the seasoning, reduce heat to low, and partially cover with a lid. Allow to cook, stirring once or twice, until the kale is cooked and tender to taste (we like it a little "al dente" but you can cook it longer if you prefer). If the vegetables appear to be drying out as they cook, you can add a very small amount of water to prevent scorching on the bottom of the pot or pan. Before serving, taste for balance and add more steak seasoning if needed. Makes 2 to 4 servings.

Zestfully yours,
Gloria


Monday, June 9, 2014

Seared Pork Chops with Zesty Italian Seasonings

A well-seasoned cast iron skillet is a must for the following recipe, as are the best pork chops you can get, ideally from a small farm specializing in heirloom hog breeds rather than your standard mass-produced pork chop found in supermarkets and even most butcher shops. But if "fancy" pork chops aren't in your budget, or aren't available in your area, don't fret: The following cooking technique and seasoning blend will bring out the very best in any pork chop.

When selecting pork chops, I prefer bone-in chops with a nice amount of fat, especially if from an heirloom hog. Here in Montana, the Bozeman food co-op had guinea hog chops -- no, not guinea pig, although from the diminutive size of the chops I did wonder for a moment if they had come from an overgrown, cuddly guinea pig. Guinea hogs are a rare breed of pig that's unique to North America and known for its small size, and they produce a rich, deeply flavorful meat. You can read more about guinea hogs here.

There are no ingredient quantities for this recipe because it works for any number of pork chops and you season them to taste. This recipe is all about technique, and about the quality of the ingredients.

Ingredients
Pork chops
Fennel Seed Whole, 1 lb, StarWest Botanicals
Fennel seed
Lard, bacon fat, olive oil or pure coconut oil (not extra virgin because of its flavor)
Coarse sea salt or Kosher salt
Cracked or coarse-ground black pepper
Red pepper flakes
Fennel seed
Granulated garlic
Onion powder
Dried oregano
Dried basil
Dried thyme
Dried rosemary (use your fingers to crush)
Brown sugar - just a pinch per chop side

Heat your cast iron skillet on high until you can feel the heat radiating from it and it has barely begun to smoke -- you'll want to have your kitchen well-ventilated by opening windows if practical, running any vent fans, and probably disconnecting your smoke detector. While the skillet is heating, go ahead and preheat your oven to 350°F, pat dry your pork chops and place them on a plate, then season the top side of the chops with the herbs & seasonings, using your fingers to sprinkle them evenly, liberally applying the salt & pepper and following your taste preferences for the remainder of the seasonings. I recommend going light on the fennel seed and rosemary because of their strong flavor. Gently pat the seasonings onto the chops with your fingers, without rubbing.

When the skillet is smoking-hot, use a bundled up paper towel or piece of brown paper bag to smear on the grease or oil, working quickly to coat the skillet generously and evenly. Let that heat for a few seconds until almost smoking, then carefully place the chops in the greased skillet seasoned-side down, and then LET THEM BE for 90 seconds to 2 minutes (the latter for very large or very thick chops). Resist the urge to disturb the chops because doing so will prevent them from searing properly.

While the chops are searing, season the exposed side of the chops in the same manner as you did the first side. When the 90 to 120 seconds have passed, carefully flip the chops over to sear the other side, again letting them cook undisturbed for 90 seconds to 2 minutes. After that allotted time, turn off the burner and carefully place the skillet with the chops in your preheated oven. Let the chops cook in the oven at 350°F for 25 to 30 minutes or until they reach an internal temperature of 145°F using a meat thermometer -- don't touch the bone with the probe or you'll get a false reading.

Stubb's Pork Rub
Buy Stubb's Pork Rub
When the chops are done, remove skillet from oven and serve the pork chops. Enjoy!

Zestfully yours,
Gloria

PS: If you want to save time, you can season the pork chops simply with salt & pepper, or with a good pork seasoning blend that has little or no sugar, such as Stubb's Pork Spice Rub, Historic Lynchburg Tennessee Whiskey Seasoned Salt or PETA Barbecue Seasoning, then use the same cooking technique for searing and finishing in the oven.

PPS: If you're curious about the greens served with the pork chops in the photo at the top of this post, stay tuned because that recipe will be available on this blog in the very near future.


Thursday, June 5, 2014

Low Carb Recipe: Faux French Onion Soup (aka Mushroom & Garlic Soup)

Low-carb mushroom soup
Greg and I both love homemade French onion soup, but the real thing doesn't fit into either of our dietary preferences: The bread topping makes the soup prohibitively high-carb for Greg, and its cheesy high-fat richness makes it a very rare indulgence for me.

The following soup was one of the last meals I cooked in North Carolina before our move, born primarily of the need to use up the last frozen container of my homemade brown stock along with the shredded cheese, mushrooms, garlic, spring onions and part of a yellow onion residing in our refrigerator. I did not intend to make a soup that tasted very similar to French onion soup. It was only after we tasted it and Greg exclaimed, "I love it! It's like French onion soup without the bread!" that I decided to call this robust mushroom & beef stock soup a "faux French onion soup."

Regardless of whether you're looking for a low carb or gluten-free soup recipe, or are watching your fat intake, or simply enjoy mushrooms and hearty soups made with beef stock, this recipe is for you. Its flavors are sufficiently robust that you can omit the cheese, if you prefer.

sauteed mushrooms
Sauteing the mushrooms
Ingredients
2 Tbs butter plus 1 Tbs butter
1 cup very thinly sliced onion
1 cup thinly sliced spring (or green) onions including green top
Approx. 15 cloves garlic, crushed
8 oz sliced mushrooms
scant 1/4 cup dry sherry
1 quart beef broth OR 2 cups brown stock + 2 cups water
Salt & Pepper to taste
Opt: A splash or two of Hot Pepper Sherry
Shredded cheese, e.g., Swiss, gruyere, gouda, parmesan, mozzarella, etc.

Faux French Onion Soup recipe
Simmering the soup
Melt 2 Tablespoons butter in a heavy-bottomed soup pot or Dutch oven over medium heat. Add onion and cook, stirring occasionally, until lightly golden but not yet caramelized. Stir in the spring onions & garlic and saute until softened and the garlic is lightly golden. Stir in remaining Tablespoon of butter and when melted, stir in the mushrooms. Saute the mushrooms until soft. Slowly stir in the sherry to deglaze the bottom of the pot, then allow to simmer & cook, stirring occasionally, until the liquid has mostly evaporated but the vegetables are still moist. Add the broth or stock & water, bring to a simmer (you may need to increase the heat) and cook at a simmer, stirring occasionally, for 25 to 30 minutes. Taste for balance, season with salt & pepper to taste, and add a splash or two of pepper sherry if you like a spicy soup. Serve in bowls and top each serving with shredded cheese if desired. Makes 4 servings.

Zestfully yours,
Gloria


Saturday, May 24, 2014

Mushrooms in Tarragon Sherry-Cream Sauce

Mushrooms in Tarragon Sherry Cream Sauce
The following recipe was inspired by three different people: Two of my friends who appreciate good food but have never met each other, and my dear husband who, after almost 26 years of marriage, still surprises me by occasionally declaring that he hates or loves a particular ingredient.

Case in point: Greg recently complained that I "never buy mushrooms," and then informed me that he he loves them. Well, perhaps if I'd known this sooner, he'd have enjoyed more home-cooked meals featuring mushrooms (and of course he could have bought said mushrooms anytime he went grocery shopping...).

And now you know why mushrooms have been appearing in more of my recipes.

The following creamy mushrooms are lovely served over baked, roasted, broiled or grilled chicken or turkey breast; absolutely divine over pork chops (my favorite way to enjoy them) or pork loin; magnificent with steak or brisket; and probably also quite tasty with venison and game meats, although I haven't tried that yet. You can also enjoy them as a rich side dish on their own, which is what we did the first time I made this recipe. For a thinner consistency, add a little more half-and-half or a splash of milk -- and for a thicker consistency, use a little less or cook a little longer.

Ingredients
2 Tbs plus 2 Tbs butter
Mushroom sauce recipe
8 oz mushrooms (brown or white), sliced
2 Tbs flour (I use whole wheat)
1/2 cup half & half
3 Tbs dry sherry
1/2 tsp dried tarragon (or more to taste)
1/4 tsp salt
1/4 tsp ground black pepper

Melt 2 Tablespoons butter in a small saucepan over medium heat. Add mushrooms and saute until just softened. Use a slotted spoon to transfer the mushrooms to a small bowl and set aside. Add remaining 2 Tablespoons butter to the saucepan and melt over medium heat. Slowly stir in the flour and cook, stirring constantly, to make a blond roux -- this takes about 4 minutes, and the roux should be the consistency of a paste, have a light golden color and emit a nutty aroma that indicates the flour has cooked.

Busha Browne's Spicy Hot Pepper Sherry
Pepper Sherry
When you have a blond roux, stir in the sherry and cook, stirring constantly, until you reach an even consistency. Slowly pour in the half & half, again stirring constantly to produce a smooth consistency. Stir in the tarragon, salt & pepper, then add the mushrooms along with any juices in the bowl. Continue to cook, stirring gently, until all ingredients are thoroughly incorporated and the sauce is as thick as you want it. Remove from heat and serve immediately.

Zestfully yours,
Gloria
Carolina Sauce Company

PS:  To add a little bit of a spicy kick, add a splash or two of Busha Browne's Hot Pepper Sherry, or substitute up to 1/2 Tbs of regular sherry with the hot pepper sherry for a bigger peppery bite.


Wednesday, May 14, 2014

Spicy Vodka Risotto with Spinach & Mushrooms

This recipe is what happens when I'm desperate for a creamy, richly flavored risotto.... and I have nary a drop of white wine but a nearly full bottle of vodka.

Prior to creating my spicy vodka risotto with spinach and mushrooms, I had never heard of anyone using vodka in a risotto. But being an adventurous sort in the kitchen (except when it comes to pressure cookers, of which I am terrified), I figured I had nothing to lose by giving it a try especially since I was cooking only for myself. To my relief, delight and gustatory satisfaction, the risotto was not only edible, it was downright delicious -- and Greg can back me up on that as he did try a bite of the leftovers the following day.

A note about the rice: Most people are familiar with arborio rice for risotto. Somewhat less well-known is carnaroli rice, which happens to be what I had in our RV kitchen and therefore what I used. Feel free to use either type of rice, as both are equally good for risotto. While on the topic of ingredients, be sure to use a decent quality vodka that you consider good enough to drink.

Some words of caution: Vodka can burst into flames if added to a very hot cooking vessel. I recommend taking your pot off the burner before pouring in the vodka, and then pouring it in slowly while stirring. Also make sure your kitchen is well-ventilated, as the evaporating alcohol fumes can get intense (at least they did in my tiny RV kitchen, until I opened up some windows). Finally, if you are sensitive to hot and spicy foods, use no more than half the amount of red pepper flakes listed below. On the other hand, if you are a serious chilehead, feel free to add more than the listed amount, or even add a dash or two of ghost pepper powder or dried jolokia chili powder.

Ingredients
3 Tbs olive oil
8 cloves garlic, very thinly sliced
Carnaroli Long Grain Italian Rice by Gli Aironi
Click to buy Carnaroli rice
1 medium onion, chopped
1/2 medium bell pepper, chopped
4 oz (half of an 8oz box) brown mushrooms, sliced
1 tsp dried oregano
1 tsp dried thyme
1/2 tsp crushed red pepper flakes
1 bag (6 to 8 oz) baby spinach
1 Tbs butter or olive oil
1 cup Carnaroli rice
1 cup vodka
2 1/2 to 3 cups water or broth (chicken or vegetable)
1/2 tsp sea salt (or Kosher or table salt if that's what you have)
1/4 tsp ground black pepper
1/2 cup (or more to taste) shredded parmesan cheese

Heat the oil in a heavy-bottom large pot or Dutch oven over medium-high heat. Add garlic, onion & bell pepper and saute until onion is turning golden and the pepper has softened. Add mushrooms and saute until just softened. Stir in the oregano, thyme and red pepper flakes, then add spinach and cook, stirring frequently, until spinach is wilted. Use a slotted spoon to remove sauteed vegetables to a bowl and set aside.

Vodka risotto recipe
Cooking after adding vegetables
Add the Tablespoon of butter or oil to the pot and melt (or heat) over medium heat. Stir in rice and cook, stirring frequently, until rice is coated and turns translucent on the edges with a white spot in the middle (about 3 minutes). Remove pot from heat and slowly pour in the vodka, stirring constantly. Return pot to burner and cook at a simmer, stirring constantly, until almost all the liquid is absorbed, then slowly pour in half a cup of the water or stock. Continue to cook at a simmer, stirring frequently, until almost all the liquid is absorbed. Continue to add water or stock in half-cup increments, following the same cooking method, until the rice is creamy and almost fully cooked but still somewhat firm in the middle, and reserving 1/4 cup of water or broth for later. Note: Your rice might absorb anywhere from 2 1/2 cups of liquid to 3 cups, or a little more or a little less. Use your judgement and preference for "creaminess vs. chewiness." Don't feel compelled to use all 3 cups of liquid, or worry if the rice absorbs less than 2 1/2 cups before reaching your preferred doneness.

When rice is almost done, stir in the sauteed vegetables along with any liquid remaining in the bowl, and also stir in the salt, black pepper and reserved 1/4 cup of water or broth. Cook and stir until the vegetables are evenly incorporated into the rice and the rice is tender. Add the parmesan cheese and stir until combined and melted. Taste for balance and add more salt and/or pepper if desired. Serve hot. Makes 4 to 6 servings.

Zestfully yours,
Gloria


Saturday, May 10, 2014

Spring Salad with Strawberries & Chocolate Balsamic Vinaigrette

salad with strawberries & feta cheeseThe following recipe is an elegant twist on "throw cooking," a technique that eschews specific quantities for the ingredients and invites the cook to omit or replace any "supporting" (not principal) ingredient to suit personal preferences and what's on hand at the time, e.g., omit the celery if you don't like or have it, replace the sweet onion with spring onions or red onion, etc.

While the idea of using a chocolate-infused balsamic vinegar on a green salad might strike you as odd, trust me on this one. As long as you drizzle it on with judicious discretion instead of wild abandon, the overall effect will be one of velvety, mellow, dark cocoa and wood flavors rather than the sweetness of candy chocolate.

And no, I didn't mix together the vinaigrette separately to pour over the salad. Again, trust me on this.... although you are certainly welcome to do so if you prefer, or to otherwise improvise and add your own touch, of course. After all, that's the whole point of throw cooking:

To inspire, not dictate.

Ingredients
Young spring lettuce leaves, washed, patted dry & torn
1 small, slender stalk of celery, trimmed & sliced (I include the leaves)
1/2 small young cucumber, quartered, seeded & thinly sliced (I don't peel)
A few paper-thin slices of sweet onion
Several ripe strawberries, sliced
Extra virgin olive oil
Coarse sea salt
Cracked black pepper
Dried or fresh thyme
Chocolate balsamic vinegar
Crumbled feta or goat cheese

Place the first 5 ingredients in a large bowl, drizzle with EVOO to taste, sprinkle with sea salt, pepper and thyme to taste, then gently toss. Lightly drizzle with chocolate balsamic vinegar, then gently toss. Transfer to individual bowls or salad plates and top with crumbled cheese. Enjoy!

Stawberry salad with chocolate balsamic dressing

Zestfully yours,
Gloria

PS: Do you enjoy the interplay of savory and sweet when adding strawberries to recipes? And do you like spicy foods? Then check out the strawberry hot sauces & salsa available at the Carolina Sauces online store!


Thursday, May 8, 2014

Vegan Recipe: The Unlucky Hunter's Lentils Cacciatore

Lentils Cacciatore vegan recipe
When Greg's away, the Glo will play -- in the kitchen, that is, and with carbohydrates, which are otherwise verboten for the sake of his diet.

Lentils are one of my favorite legumes because they don't require overnight soaking or lengthy cooking periods. I also appreciate their earthy, "meatier" and less "beany" flavor, and their small size makes them useful in a wider variety of recipes than larger beans.

I had been craving lentils for some time now, so one recent morning when Greg informed me that he'd miss dinner due to an afternoon appointment back in Durham followed by a late-night hockey game in Raleigh, I jumped on the opportunity to play in the kitchen with carbs, and more specifically, with regular brown lentils. The following recipe is what I came up with, which was inspired by a friend's request for vegan Dutch oven recipes.

The name is a play on "Chicken Cacciatore," or hunter-style chicken (cacciatore means hunter in Italian), a traditional Italian dish that traces its roots back to earlier times when a hunter would bring back a rabbit or wild fowl to throw in a pot along with tomatoes and other vegetables from his family's garden, some herbs, maybe a few foraged mushrooms and a splash or two of wine. Presumably, an unlucky hunter would have to settle for a meatless stew, perhaps one like this...

Ingredients
1 cup lentils, picked over & rinsed
2 cups water
cooking lentils1 can (14.5 oz) diced tomatoes, undrained
2 Tbs olive oil
1 medium onion, chopped
1 small bell pepper, or 1/2 large bell pepper, seeded & chopped
6 cloves garlic, crushed
4 oz (1/2 of a package) small brown mushrooms, cleaned & quartered
1/2 cup dry red wine (something Italian is perfect)
1 tsp dried oregano
1/2 tsp salt
1/4 tsp of each of the following dried herbs: rosemary (crushed lightly with your fingers), rubbed sage, thyme, parsley
1/4 tsp ground black pepper
1/4 tsp (or to taste) red pepper flakes (or hotter crushed chilies if preferred)

Heat the olive oil in a Dutch oven over medium heat, add onions and saute until beginning to turn golden. Add garlic & bell pepper and saute until softened. Add the rest of the ingredients except for the mushrooms and the salt, stir and bring to a simmer. Partially cover with lid and cook at a simmer for 20 minutes, stirring once or twice.

Stir in the mushrooms, bring back to a simmer, partially cover with lid and cook at a simmer for another 10 minutes or until lentils are tender. Stir in the salt, taste for balance and adjust seasonings as desired. Serve in bowls, either "as is" (shown on left here) or spooned over cooked pasta or rice (shown over rotini in the large photo at the top of this post). Makes approx. 6 servings and leftovers are delicious reheated the next day.

Zestfully yours
Gloria
Carolina Sauce Company


Monday, May 5, 2014

Our Favorite Cinco de Mayo Recipes (Not the Usual Stuff!)

Bread recipe for Cinco de Mayo
¡Feliz Cinco de Mayo! Or, Happy 5th of May!

Surprisingly, Cinco de Mayo is a much bigger deal here in the U.S. than it is in Mexico, perhaps because so many Americans enjoy having an excuse to eat hearty Mexican food with lots of big, zesty flavor and drink beer, tequila shots and margaritas.

If you're planning on celebrating today with Mexican food or dishes inspired by Mexican cuisine and are searching for recipes for Cinco de Mayo, you've come to the right place. Here are some of our favorite Cinco de Mayo recipes at the Carolina Sauce Company, several of which are refreshingly different from the usual "rice & beans, cheese & sour cream, guacamole & chips" fare (not that there's anything wrong with those, but sometimes it's fun to change things up):

Cinco de Mayo Skillet Bread: As easy to make as a cornbread, but made with flour instead of cornmeal and loaded with cheese and chili peppers yet relatively healthy in comparison to other quick breads, this crowd-pleaser is fantastic with any meal, and not just on the fifth of May. Its also festively colorful, as you can see from the photo above on the left. Click for the recipe for Cinco de Mayo Skillet Bread.

Five-alarm chili recipe
Five-Alarm Chili: I can't resist including this recipe, even if not truly authentic in terms of Mexican pedigree. But with a five in the name, and plenty of fiery heat along with ingredients frequently used in Mexican cuisine, this HOT chili is a natural fit for Cinco de Mayo, especially if the weather is still fairly cool in your neck of the woods. Click for the recipe for Five Alarm Chili. By the way, this chili is shown on the right with home-cooked tortilla chips, which are extremely easy to make, a lot tastier served warm from the oven (yes, they're baked but blow away the "baked" chips sold in supermarkets), and far better for you than store-bought chips. Click here for how to make healthy tortilla chips.

crock pot chili recipe
If you want to serve chili today but prefer a milder, more family-friendly recipe that's more about the flavor rather than fiery heat, you can't beat my Crock Pot Chili, which I not-so-humbly call the Best Ever Chili Recipe. Are you skeptical about my boast? Go ahead and try my recipe, and I bet you'll agree -- just as everyone has who's already tried it. It's also very easy to make, and you can make it as mild or as spicy as you prefer. Click here for the Best Ever Crock Pot Chili Recipe, which is also shown on the left.

avocado tuna melts recipe
Another non-traditional but Mexican-inspired recipe that's appropriate for Cinco de Mayo is my recipe for Avocado Tuna Melts. This one is extremely popular on Pinterest, and also among followers of low-carb diets. It's high in protein and healthy fats because of the avocado, and is devilishly spicy without being overwhelmingly hot. The avocado becomes decadently creamy when roasted in the oven, resulting in a luxurious and satisfying mouthfeel. It also looks pretty as well as tasting great, and even if you're a hard-core bread addict like I am, you won't miss the bread once you experience a bite. Click for the recipe for Avocado Tuna Melts.

Mexican tuna salad recipe
Continuing with the healthy but zesty theme, I give you my Mexicali Tuna Salad, another low-carb recipe featuring Mexican flavors without restaurant-food guilt. Especially if you're celebrating earlier in the day and don't want to get weighed down with the more traditional rice and beans or heavy cheese and sour cream, these feisty and festive spicy salads are perfect -- and they wash down nicely with margaritas or beer. And yes, you can turn the salad into Mexican wraps by spreading it onto flour or corn tortillas and rolling them up, or dig into it with tortilla chips if carbohydrates aren't a concern. Click for the recipe for Mexicali Tuna Salad.

For more Cinco de Mayo recipes, click here.

And if you're in the market for genuine Mexican hot sauces, the Carolina Sauces online store is the place to go -- you can search by country from our "sauces by country" drop-down menu on the left margin of any page in the store, and just select Mexico to see what we have.

Zestfully yours,
Gloria


Sunday, May 4, 2014

Smoked Garlic, or, How to Roast Garlic on a Smoker

salad with smoked garlic
I love garlic.

Whether served raw and slivered paper-thin into EVOO with a sprinkling of coarse sea salt and cracked peppercorns as a gloriously pungent and assertive dip for artisan bread, or mellowed into robust yet elegantly well-rounded earthiness through slow roasting, sauteing, baking or frying, I can safely say that garlic is one of my favorite things to eat.

My favorite way to enjoy garlic has always been roasted -- that is, until yesterday.

Yesterday, Greg made smoked garlic.

Cooking garlic cloves on a smoker produces the most wonderfully smooth, rich roasty flavor and buttery-soft spreadable texture I have ever experienced in garlic. To my surprise, the smoked garlic had just a light, subtle kiss of smokiness that played a complementary supporting role to the almost sweet, toasty and deeply complex roasted garlic flavors. And there was absolutely no pungency or sharpness. In short, the roasted garlic tasted sublime.

If you enjoy garlic, especially when roasted, you'll be happy eating smoked garlic as an appetizer with crackers, crostini or bread (you can mash a bunch of smoked cloves into a paste or use a knife to spread a clove onto your cracker etc.); blended with cream cheese and sour cream to make a roasted garlic dip; spooned over sliced roast beef, London broil, grilled pork chops, roasted chicken or turkey, or with other similar main courses; tossed with cooked vegetables or a salad; and even on its own.

cooking garlic on a barbecue smoker
Smoked garlic is virtually foolproof to make, and takes practically no effort, especially if you're already firing up your smoker to cook other things.

In the photo on the left, Greg smoked the garlic in a tray along with a separate tray of jalapeno cheddar cheese, placing both trays on the smoker when the chicken he was smoking had about an hour left to cook.

If you can buy containers of already-peeled "dry packed" (not in a jar with liquid) garlic cloves at Whole Foods or other supermarket, I recommend make a large batch because you can store the smoked garlic in your refrigerator if you place it in a small jar or other tightly lidded container and cover the smoked garlic cloves with olive oil.

Here's how to cook garlic on your smoker:

Ingredients
raw garlic clovesLots of peeled garlic cloves (at least a couple dozen)
Olive oil or butter (about 1 Tbs per 15-20 cloves)
Kosher salt or other salt

Start your smoker and bring to about 250° to 275° F. Place the garlic in a small aluminum foil pan, such as the disposable ones for baking mini-loaves of bread if smoking 2 or 3 dozen cloves; a larger foil pan for larger quantities. The garlic cloves should be spread out to cover the bottom of the pan as close to a single layer as possible and not more than a double layer in depth, as shown on the right, to ensure even cooking.

Add the olive oil or butter, then sprinkle very lightly with salt -- Greg used no more than 1/4 tsp for this batch of about 30 cloves.

how to smoke garlic

Place the pan on your smoker and cook until the garlic cloves are golden-brown and extremely soft -- this takes about 45 to 60 minutes, and below is what they looked like after 30 minutes:

how to roast garlic on a BBQ smoker

Cooking time will vary depending on how much garlic you're smoking, the smoker temperature, and weather conditions that may influence smoker temperature (e.g., winds, humidity, cold, etc.). You might also prefer a deeper or a lighter roast. Here's how we like our smoked garlic, at about the one-hour mark:

smoked garlic

That's it!

Zestfully yours,
Gloria


Friday, May 2, 2014

A Delightfully Simple Strawberry Dessert with an Unusual Twist

chocolate infused balsamic vinegar
Have you ever tried chocolate-infused balsamic vinegar?

I received a lovely little bottle of this luxuriously unctuous, magnificently complex and mysteriously opaque liquid as a gift, and was immediately seduced by its satiny mouthfeel and marvelously mellow balsamic flavor that lacked any sharp vinegar edginess. The card tied to the neck of the bottle explained that the balsamic vinegar had been aged for at least 25 years, resulting in an almost syrup-like consistency with lusciously layered wood notes reminiscent of a fine, well-aged red wine. The infusion of chocolate provided sumptuously deep, nuanced, dark cocoa notes that harmonized beautifully with the other flavors

The thoughtful and generous friend who gave me this gourmet treat explained that chocolate balsamic vinegar can be used with oil to dress salads or blended with cream cheese for a dip, and the card on the bottle suggesgted drizzling over vanilla ice cream or fresh berries, or using as a marinade for chicken and pork. I bet it would be fantastic drizzled over New York cheesecake, too, and possibly on bread pudding, warm brie or rice pudding as well, and even as a marinade for wild game.

Inspired by the thought of berries and creamier style cheeses, I came up with the following dessert which is deceptively simple in terms of ingredients and preparation, yet remarkable in its layers of intriguingly unexpected yet delightfully complementary flavors. There is no need to measure the ingredients -- use the proportions that look, sound and taste good to you. You could also choose to add one or more of the following ingredients, none of which I've done yet (simply because I haven't had them on hand yet) but each of which I suspect would work quite nicely and add a pleasantly complementary flavor note: A chiffonade of fresh basil or mint leaves; a gentle dusting of very coarse sea salt and coarsely ground peppercorns; a light sprinkling of thinly sliced spring onions (a little bit of the green tops as well as the white bulb).

If you try this dessert or any variations thereof, please leave a comment below to let us know what you did and how it turned out! Click here to buy chocolate balsamic vinegar (it's surprisingly affordable and available through one of our trusted partners).

strawberries with feta & chocolate balsamic vinegar
Ingredients
Fresh ripe strawberries (perhaps 5 or 6 per person)
Crumbled feta cheese or goat cheese
Aged chocolate-infused balsamic vinegar

Wash and dry the strawberries, cut off the green tops and halve lengthwise. I like to leave 1 strawberry per serving untrimmed and uncut to use as a garnish. Arrange several strawberries in each serving bowl, sprinkle with as much cheese as desired, then drizzle as desired with the chocolate balsamic vinegar.

Note: If using any of the following additional ingredients, I recommend adding as follows:
Sprinkle the herb chiffonade after you've drizzled the berries and cheese with the vinegar
Lightly sprinkle the salt & pepper over the berries before topping with cheese and vinegar
Serve the berries and sliced spring onion together before topping with cheese and vinegar

Zestfully yours,
Gloria
Carolina Sauce Company


Friday, April 25, 2014

Low-Carb Recipe: Cheesy Bacon Cauliflower Smash

Mashed cauliflower with cheese & bacon
The following is Greg's recipe for a decadently delicious and sumptuously rich, low-carb alternative to "loaded" mashed potatoes.

Gloriously gooey, magnificently bacon-y, and zestily tangy-spicy with pickled jalapenos (or hotter peppers if you prefer), the last thing that will be on your mind as you dig in is that this hearty side dish is made with cauliflower. Yes, even cauliflower-haters will devour it!

Don't believe me? Try it yourself, and don't let anyone know the "secret" main ingredient.

By the way, you can use any kind of cheese you like, such as cheddar, Swiss, hoop cheese (which is what Greg used in the photo), mozzarella, Monterey jack, etc.

The quantities of the ingredients can also be adjusted to suit your preferences, and you can use other peppers or even pickled mixed vegetables such as giardiniera instead of the pickled jalapeno slices.

Ingredients
1 head cauliflower
1/2 cup shredded cheese (any you like, e.g., cheddar or hoop cheese)
1/2 stick butter, softened
4 strips of bacon
1 onion, chopped
4 cloves garlic, minced
1/4 cup sliced pickled jalapenos*
Salt & Pepper to taste

sauteed onions and peppers with bacon
*For a hotter, spicier version, use chopped or sliced Ghost Peppers; for a milder version, use chopped or sliced Sport Peppers; for an Italian version, use Giardiniera (chopped or diced) and an Italian cheese such as mozzarella

Break up cauliflower into florets and boil or steam until very soft. Strain and set aside. Chop bacon, place in a large, deep saucepan or a Dutch oven and cook until done but not crispy. Add onion, garlic and jalapenos to the bacon and saute until soft and onion is turning golden (photo on right shows this as it's cooking).

Add the cooked cauliflower and butter, then mash everything together until as creamy or as lumpy as you want it (Greg prefers a lumpier, more interesting texture as shown in the photo at the top). Stir in the cheese and cook until cheese melts. Taste for balance and season with salt & pepper to taste. Serve hot. Makes approx. 4 to 6 servings.

Zestfully yours,
Gloria


Thursday, April 17, 2014

Low-Carb Casserole: Garlic-Lover's Italian Sausage Bake


The following recipe is the first thing I cooked in my new oven in the Silver Sausage (aka RV-Que) here at camp. I wanted lasagna or spaghetti with meat sauce, but Greg is being so good and getting such great results with his low-carb diet that noodles, pasta or other carbs were out of the question. So I threw this low-carb Italian sausage casserole together as hearty supper using the ingredients I had on hand that would work for both of us.

My recipe calls for dried herbs because that's all I had at the time. Normally I would have included some rosemary but I was out. Feel free to add some with the other herbs if you wish. Instead of an Italian cheese, I used a local cheddar-style hoop cheese because that's what was available when we went to the little grocery store in town. For a more authentically Italian flavor use mozzarella, or parmesan or other Italian cheese. We also happened to be out of eggs, which is why there are none in this recipe and why I'm calling it an Italian Sausage "Bake" rather than a "casserole." The absence of eggs and bread crumbs or other such binders resulted in a looser consistency that was spoonable but could not be cut into neat portions. In other words, the finished product wasn't exactly pretty when served... but once we took a bite we quickly forgot about appearances and happily tucked in. I hope you will do likewise.

One last note: If you are not on a low-carb diet, you are more than welcome to spoon this zesty sausage bake over cooked pasta, or enjoy it with some bread.

Ingredients
1 lb bulk Italian pork sausage
Optional: Olive Oil for sauteing
1 large onion, chopped
1 bell pepper, chopped
Lots of fresh garlic cloves (I used 20), crushed then minced
4 oz. sliced mushrooms (I used baby bellas)
Recipe for Italian sausage casserole
Simmering everything before baking
Small bunch of dark leafy greens (e.g., chard, spinach, kale... I used fresh radish tops), finely chopped to make 1 cup
1/4 cup red wine (something Italian is perfect)
1 14.5oz can diced tomatoes, undrained
1 Tbs dried oregano
1 tsp dried parsley
1/2 tsp rubbed sage
1/2 tsp crushed red pepper flakes
1/2 tsp salt or to taste
1 1/2 cups shredded or grated cheese

Brown the sausage in a large, deep skillet, stirring regularly to break up clumps. Use a slotted spoon to transfer the browned sausage into a medium pot or saucepan and keep warm over low heat. Drain off some of the rendered pork fat from the skillet, leaving about 2 Tbs for sauteing (that's what I did), or, if you prefer a healthier fat, drain off and discard all of the pork fat and add about 2 Tbs olive oil to the pan. Add onion and saute over medium heat until soft and translucent. Stir in bell pepper & garlic and saute until soft. Add mushrooms, chopped greens & red wine, and saute until the greens have wilted and the liquid in the pan has reduced somewhat.

Low-carb Italian sausage bakeTransfer the sauteed vegetable mixture into the pot with the sausage. Add the undrained tomatoes, herbs and seasonings to the pot (do not add cheese), and stir to combine well. Bring to a simmer and cook for 20 to 30 minutes uncovered at a simmer, stirring occasionally, until much of the liquid has evaporated -- you want a consistency that's thicker and drier than a sauce, but not completely dry.

When the mixture looks almost ready, preheat oven to 350°F. When the sausage mixture is cooked to the right consistency, pour it into a casserole dish (I didn't grease it and it came out just fine). Sprinkle top with cheese and bake at 350°F until the cheese is bubbly and lightly golden, about 20 minutes. Makes approx. 6 servings. Serve in bowls, and for a spicier flavor splash on some of your favorite all-purpose hot sauce.

Zestfully yours,
Gloria
Carolina Sauce Company


Sunday, April 13, 2014

Vegetarian Matzoh Ball Soup

Matzo ball soup recipe
Whether you're Jewish or gentile, vegetarian or carnivore, this soup is the epitome of comfort food especially if you're under the weather -- and it's Kosher and appropriate for a Passover seder if you observe Pesach. While traditional matzo ball soup uses chicken broth, my vegetarian-friendly version uses vegetable broth (the photo on the left shows a traditional soup made with chicken broth). Ideally you should use homemade broth because it will taste richer than anything you can buy at the store. You can also "fortify" the broth by adding sliced carrots and other such soup-friendly vegetables if desired.

For best results, crumble the matzoh crackers to the consistency of cracker crumbs either by using a food processor or by placing the crackers in a large zip-top plastic bag and crushing with a rolling pin. When soaking the crackers, use the least amount of water possible, just barely enough to cover the crumbled crackers. Finally, it is crucial that you not add too much matzoh meal to the mixture, or else the balls won't float and will likely disintegrate while cooking in the broth. And because the dough will be sticky, you may want to coat your hands with olive oil before forming the balls.

Ingredients
1 10oz package matzoh crackers
1/4 cup olive oil
3 eggs (and possible an extra one)
2 shallots, very finely chopped
1 small carrot, finely grated
2 cloves garlic, finely minced
1 Tbs finely chopped fresh parsley OR 1 tsp dried parsley
1 tsp Kosher salt
1/4 tsp ground pepper
Matzoh meal (probably no more than 1 Tbs)
2 quarts vegetable broth

To make the matzoh balls: Start a large pot of salted water boiling on your stove. Finely crumble the matzoh crackers into a large bowl. Pour just enough water over the crumbled crackers to barely cover, and let soak until softened. Drain/press off any excess water.

While the crackers are soaking, heat the olive oil in a large skillet over medium heat. Saute the shallots, carrots & garlic for a couple of minutes until softened. Add drained/pressed cracker crumbs and saute until the mixture is lightly golden, crumbly and somewhat dry (it will still be moist, like a dough). Remove from heat and transfer to a clean, dry bowl. Add parsley, salt, pepper & 3 eggs, then stir together until thoroughly combined. Mix in a little bit of matzo meal, just barely enough to allow the mixture to hold together -- the texture should be like that of ground meat for meatballs, fairly sticky but able to hold a ball shape. Adding too much matzoh meal will prevent the balls from rising when cooking and will cause them to fall apart in the broth.

Now it's time to test your mixture:  Take a small handful and shape into a golfball-sized ball. Gently drop it into the boiling water. It will sink at first, and if your mixture is just right it will rise and float after a couple of minutes of boiling. If it doesn't rise, or if it breaks apart, add a beaten egg to the remainder of your matzo mixture and work it in thoroughly, then form another test ball and repeat the test. Once you have the mixture right, i.e., the test ball rises when boiled, you're ready to form all your matzo balls and make the soup.

For the soup:  Heat the vegetable broth (and any added sliced or chopped vegetables, if desired) to a gentle boil. Carefully add the matzoh balls and cook at a low boil until all have risen -- this should take around half an hour or so. Serve and enjoy! Makes 4 to 6 servings.

Zestfully yours,
Gloria

PS: The Carolina Sauces online store is your source for zesty Kosher sauces and seasonings including Kosher hot sauce, Kosher barbecue sauce, Kosher ketchup and more! Check out our diverse selection of Kosher products, from mild to wild!


Friday, April 11, 2014

Zesty Ginger-Garlic Salmon Poached in White Wine

This simple salmon recipe features a nice balance of bright and zesty flavors that will delight the palate and the nose. The higher the quality of your ingredients -- e.g., fresh vs. frozen salmon, fresh raw ginger & garlic vs. jars or tubes, a decent wine you'd enjoy sipping with your dinner -- the better the flavors in the finished dish. But even if you use frozen fish and prepared ginger or garlic -- which is all I had at the RV when I first came up with this recipe -- it will still be tasty and satisfying to the senses.

Please don't prejudge my Ginger-Garlic Salmon by this photograph, which doesn't display the dish's true colors -- in real life the deep pink of the salmon provides a lovely contrast to the pale creamy yellow of the onions and garlic and the earthy brown of the mushrooms. I garnished with lime zest for this photo, which added a nice counterpoint to the warm pink color of the fish. Unfortunately my inexpensive, old camera and poor excuse of photo-editing software failed to capture the richness and vibrancy of the real colors.

This recipe is for two servings -- you can double it to serve four. Pair it with cooked rice or noodles, and complete the meal with a salad or cooked green vegetable such as stir-fried bok choy or steamed broccoli.

Ingredients
2 6-oz salmon fillets
2 Tbs Asian stir-fry oil (or vegetable or peanut oil)
1 small onion, peeled & trimmed
4 cloves garlic, peeled
2 baby bellas or other small mushrooms, sliced
2 tsp very finely minced ginger (or ginger paste)
1 tsp herb blend for seafood, e.g., Tennessee Whiskey Lemon Pepper & Herb Seasoning
1/2 cup white wine (something not too dry)
Salt & pepper to taste
Optional garnishes: Grated citrus zest (lemon, lime, orange or grapefruit), finely chopped fresh parsley

Heat the oil in a wok or deep, large skillet over medium-high heat. Cut the onion into quarters and then slice each quarter as thinly as possible. Likewise, slice the garlic as thinly as possible, ideally paper-thin (a very sharp chef's knife makes this much easier). Stir-fry the onion and garlic for 2 to 3 minutes until the onion begins to soften and become translucent. Add mushrooms & ginger and stir-fry another 2 to 3 minutes until mushrooms begin to soften. Stir in the herb seasoning and wine, bring to a gentle simmer, then add salmon fillets. Cook at a simmer, turning once, until salmon just barely flakes when a fork is inserted in the thickest part of fillets. Plate the salmon, taste the sauce for balance (it should have reduced a bit during cooking), season with salt & pepper to taste, stir and serve over the fish.

Zestfully yours,
Gloria


Friday, April 4, 2014

How to Make Beer-Can Chicken on a Smoker

Most people cook beer can chicken on their barbecue grill. But did you know you can make juicy, tender, succulent and flavorful beer can chicken on a smoker?

Ever since moving out to the RV-Que, Greg has been smoking whole chickens fairly regularly. It's extremely easy and takes very little work, other than building a good fire and maintaining a steady temperature, which is not difficult on fair, calm days although it is a little trickier if it's windy, very cold or rainy.

The following are Greg's step-by-step, fool-proof instructions for smoked beer can chicken:

1. Start with a large, plump, fresh or completely thawed chicken -- no old scrawny birds, because they're more likely to dry out. Also, don't forget to remove the packet of gizzards and any other items that may be in the cavity!

beer can chicken roaster2. Despite the name, do NOT use a real beer can to cook the chicken. Aluminum tastes bad in chicken, plus you don't want any chemical residues from coatings or paint from the can. Instead, use a stainless steel beer can chicken roaster, which is much sturdier and won't impart any "off" flavors or unwanted substances -- plus you can fill it with any kind of beer, or with wine, juice or other liquid as well as seasonings such as garlic cloves or citrus slices (lemon, lime, orange).

3. Choose the right wood for smoking chicken: Hickory, maple, and any fruit wood are appropriate because they will add pleasantly mellow smokiness and complementary sweet or bright notes without overpowering the natural flavor of the chicken or the spices in your rub. Mesquite generally is too harsh and strong.

BBQ Chicken Rub
4. Select a beer you like, but preferably a lighter, crisper one instead of darker, heavier beers. White wine is also a good choice.

5.  Use a full-flavored rub (rather than a mild or subtle one) that can stand up to smoking, such as Bone Suckin' Rub, American Style BBQ Chicken Rub, or Jim's Own Pincho Rub, and generously pat it all over the whole chicken.

6. Ignite the wood in a chimney starter and let it burn until you have nice hot coals, then transfer the coals into your smoker. When the smoker temperature hits 300°F, you're now ready fill your "beer can" roaster cup with beer (or other liquid), slide the chicken upright onto it, and place it in the center of your smoker.

7. Let the chicken cook on the smoker until your meat thermometer reads 180°F when inserted in a thigh and in the breast (don't let the probe hit a bone or you'll get an inaccurately high reading). This will take around 3 to 4 hours, depending on weather conditions. You should periodically check the temperature of your smoker: If it dips too far below 300°F, you may need to add more hot coals -- this is another time when a chimney starter comes in handy.

8. When the chicken is done, slide it off the can onto a plate and let it rest for a few minutes until it's cool enough to handle for cutting (or "pulling" if you're making pulled chicken BBQ). Letting the smoked chicken rest also allows the juices to settle, for the moistest, richest flavor.

Happy smoking!

Zestfully yours,
Gloria


Tuesday, April 1, 2014

How to Make Squeal Soup

Flickr photo by Virginia Hill
As any hog farmer will tell you, when you raise and butcher hogs, you use everything but the squeal.

What they won't tell you is that the squeal is the special ingredient used in an old-fashioned slow-cooked soup recipe that's a closely guarded secret among hog-farming families. The stuff of rural folklore and rustic legends, Squeal Soup is served only in farmhouses and in out-of-the-way mom-&-pop country diners in pig-farming communities, where it's served only to locals who know what to ask for because you won't find Squeal Soup on the menu.

For years I had heard whispered rumors of "squeal soup" when stopping at back-road barbecue joints throughout North Carolina, but I had yet to find anyone willing to confirm its existence, much less divulge the secret recipe or explain how one harvests a squeal.

Having recently moved out to rural Warren County, NC, I made it my mission to uncover the recipe for Squeal Soup, and to obtain a squeal to make it.

Obtaining the squeal proved to be the biggest challenge. You can't just saunter into a butcher shop or Piggly Wiggly grocery store and ask for some squeal. That will immediately give you away as an interloper from the city, or worse yet, a food blogger.

No, you need access to a live pig if you want to make genuine Squeal Soup.

According to local lore, a squeal must be harvested before butchering the hog, while it is still fat and happy and oblivious to its future fate. Dead pigs don't squeal.

To harvest a squeal, you need a curious, usually homemade, contraption that slides effortlessly, safely, comfortably and snugly over the pig's snout, and you need to be able to slip it on and off the pig quickly at exactly the right time:  On just before the pig squeals, and off -- tightly shut to trap the squeal --  before the hog realizes what's happened.

An experienced hog farmer can harvest a squeal in a matter of seconds, but that's after years of practice and sometimes the loss of a finger or three. Not having years of practice nor any extra fingers to spare, I opted to find a willing hog farmer and something to offer the friendly farmer in exchange for a fresh squeal (the selling of squeals to outsiders is seriously frowned upon among hog farmers, but it's sometimes possible to barter for a squeal).

Luckily, I was able to find such a farmer at the Piggly Wiggly one morning, when I overheard a mud-splattered, bedraggled and apparently henpecked fellow lamenting to a stockboy that his wife was demanding a bottle of something called "EVOO" after watching hours of cooking shows on the Food Network soon after they signed up for Dish TV. The stockboy had never heard of "EVOO" either, and both were at a loss when I walked up with a plan.

"I can give you a big bottle of EVOO for your wife, and you don't have to give me any money for it," I announced, immediately getting the farmer's undivided attention as the relieved stockboy slipped away to resume stacking cans of shad roe and hominy on Aisle 3.

The farmer eyed me suspiciously and asked, "What do you want for the EVOO?"

"The recipe for Squeal Soup," I replied, and before the farmer could object I added, "AND a freshly harvested squeal."

Pons Traditional Extra Virgin Olive Oil 500 mlThe farmer stood motionless and silent, mulling over my offer and weighing his options: Whether to risk the wrath of his newly-enlightened foodie wife or the ostracism of fellow farmers should they learn that he had disclosed their secret recipe AND supplied a squeal to an outsider.

Sensing weakness, I took a gamble and turned to leave when I felt a firm hand on my shoulder. He had made his choice, and chosen the lesser of two angers.

"Meet me in the parking lot here right after the store closes and bring your EVOO, and I'll have what you want," he whispered harshly and scurried out the door.

Having only a half-empty bottle of extra virgin olive oil back at the RV-Q and just enough time for the round-trip to Durham, I jumped in my car and raced straight down I-85 to the first supermarket I found in northern Durham, and purchased their largest bottle of EVOO.

I rushed back to the Littleton Piggly Wiggly, arriving just as the manager was locking the doors. A dusty pickup truck rattled into the parking lot. The farmer stepped out and looked furtively in all directions before reaching back into his truck and handing me an oddly-shaped, ominously shaking wooden container and a rumpled piece of paper. He thrust those at me and gruffly demanded, "Where's my wife's EVOO?"

I handed him the bottle, which he cradled in his arms as if carrying a treasure as he hurried back to his truck. I stared down with trepidation at the vibrating contraption in my hands and carefully placed it, along with the scrap of paper, in the passenger's seat of my car.

Back at the RV, I uncrumpled the paper and found the following crock pot recipe for Squeal Soup scribbled out in a shaky hand:

Ingredients
crock pot
1 pound cooked country ham, diced
1 smoked ham hock
1 squeal
1 small sweet onion, chopped
2 cloves garlic, minced
1 can corn kernels, drained
1 can stewed tomatoes, undrained
1 large potato, peeled and cubed
1 can green beans, drained
5 cups chicken stock
1/2 teaspoon hot pepper sauce

Dump everything in your crock pot and cook on High for half a day (start at lunchtime), or on Low all day long (start at breakfast time).

Note: You can make this soup without the squeal, but then it's just a smoky ham soup and not the elusive, legendary Squeal Soup.

My next quest: Capturing a snipe for the Roast Snipe recipe I've been hearing about.

Zestfully yours,
Gloria